13 EASY STEPS
DECKIE'S BAND INSTRUCTIONS
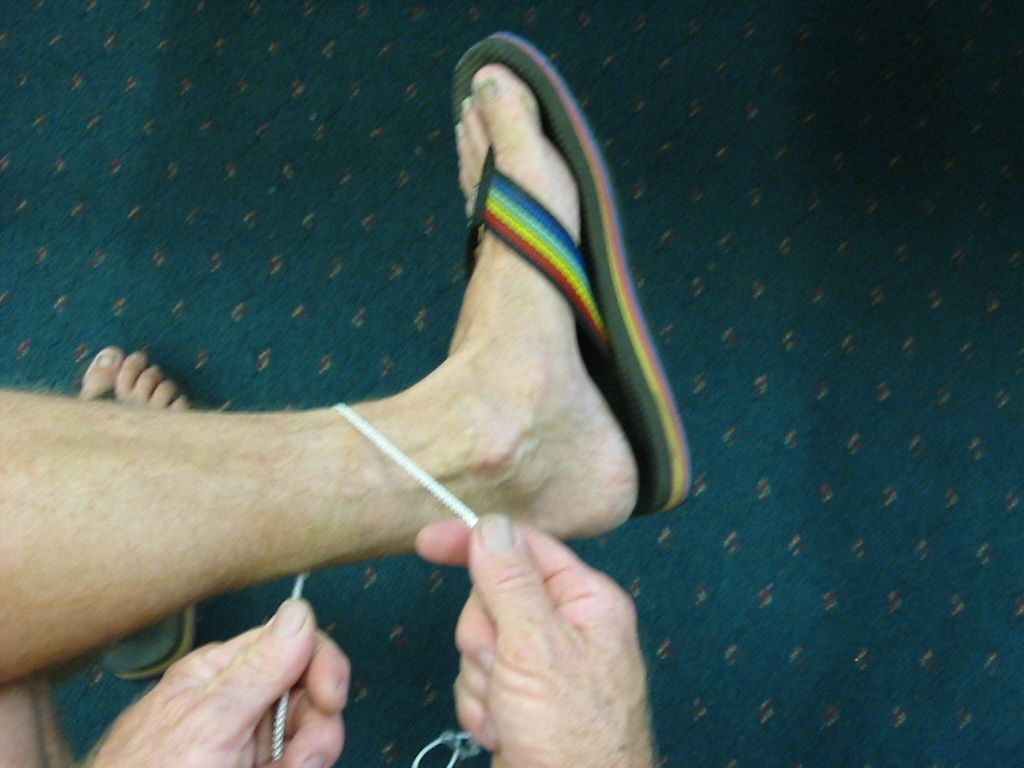
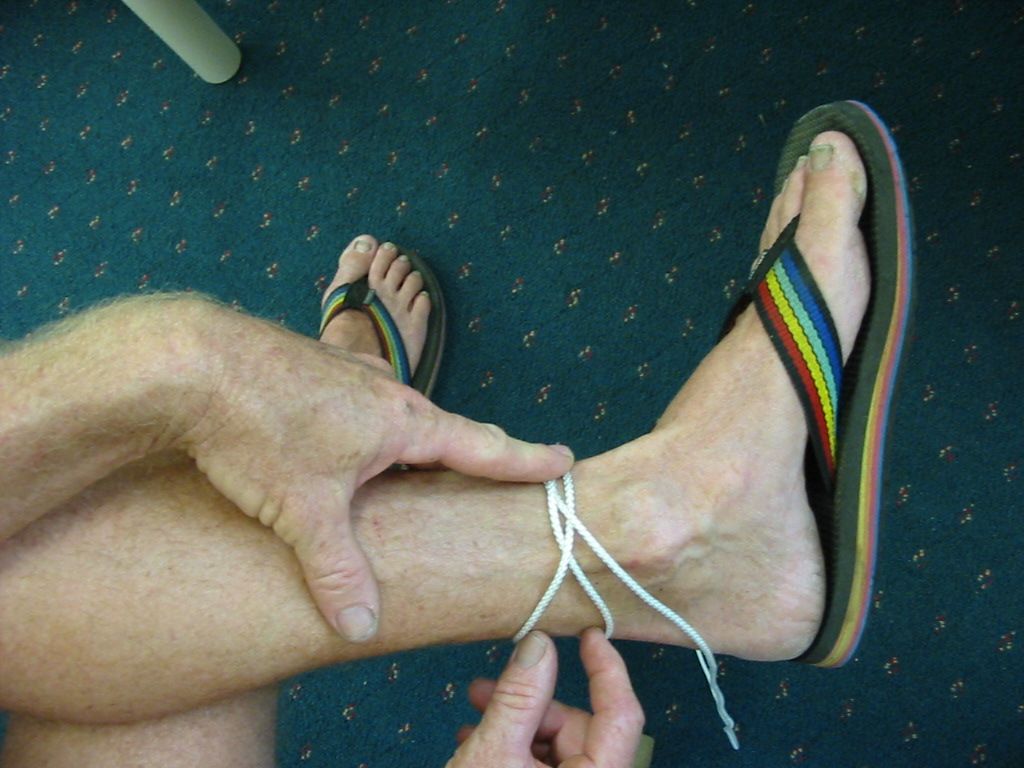
Start the Deckie's band by draping the string around the ankle or wrist.
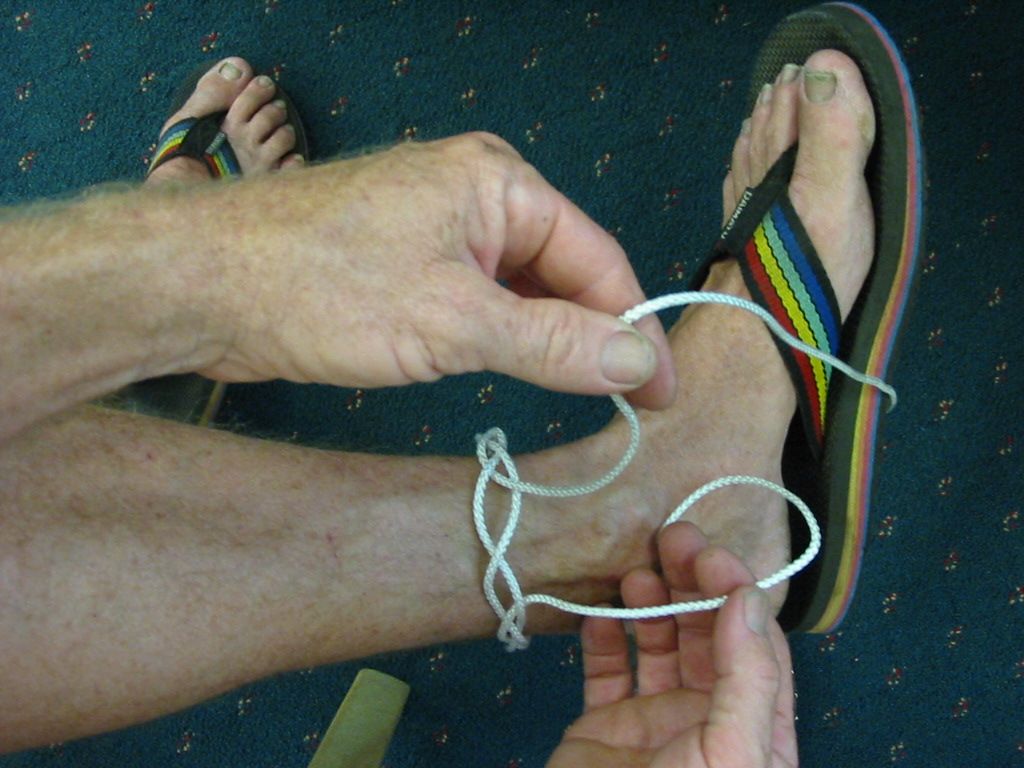
Step 1
With your left hand pass the string over the leg and itself and bring it up underneath.
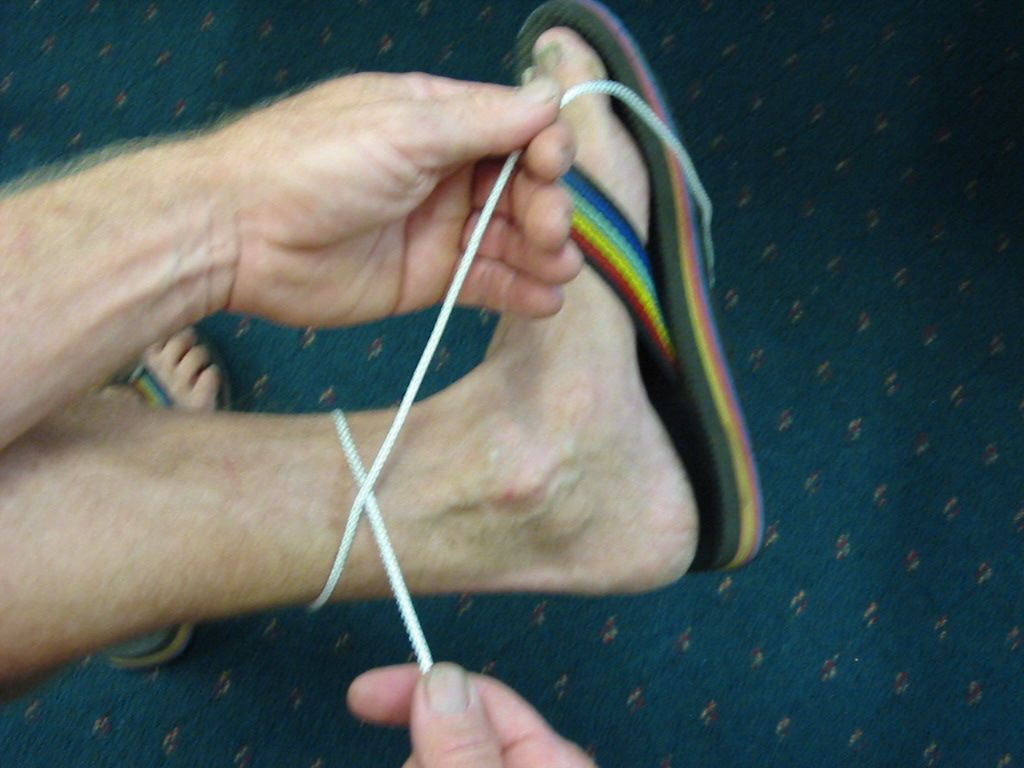
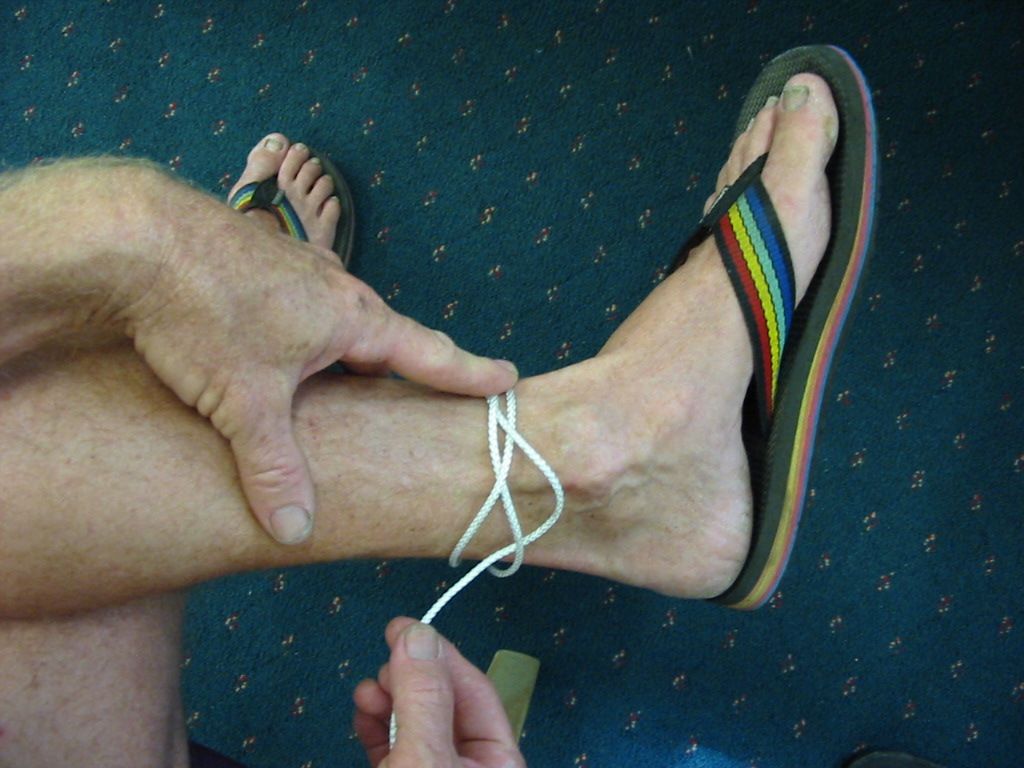
Step 2
Step 3
Now you have to pass the string over the part you just wrapped around the leg and under the part you're holding with your right hand.
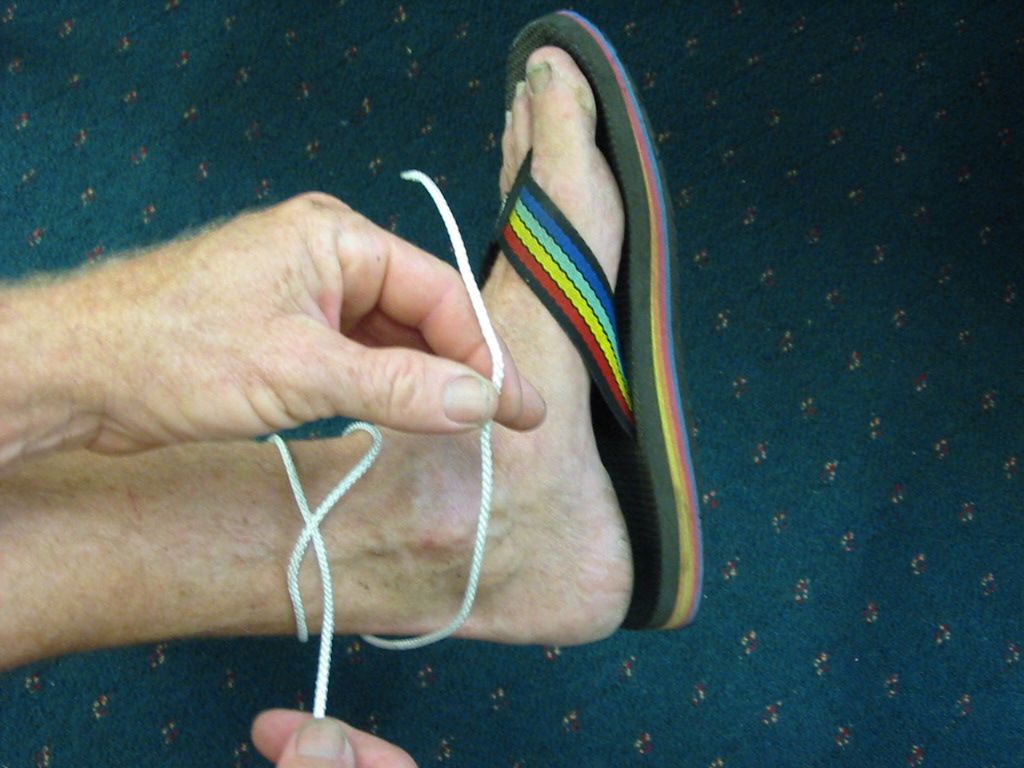
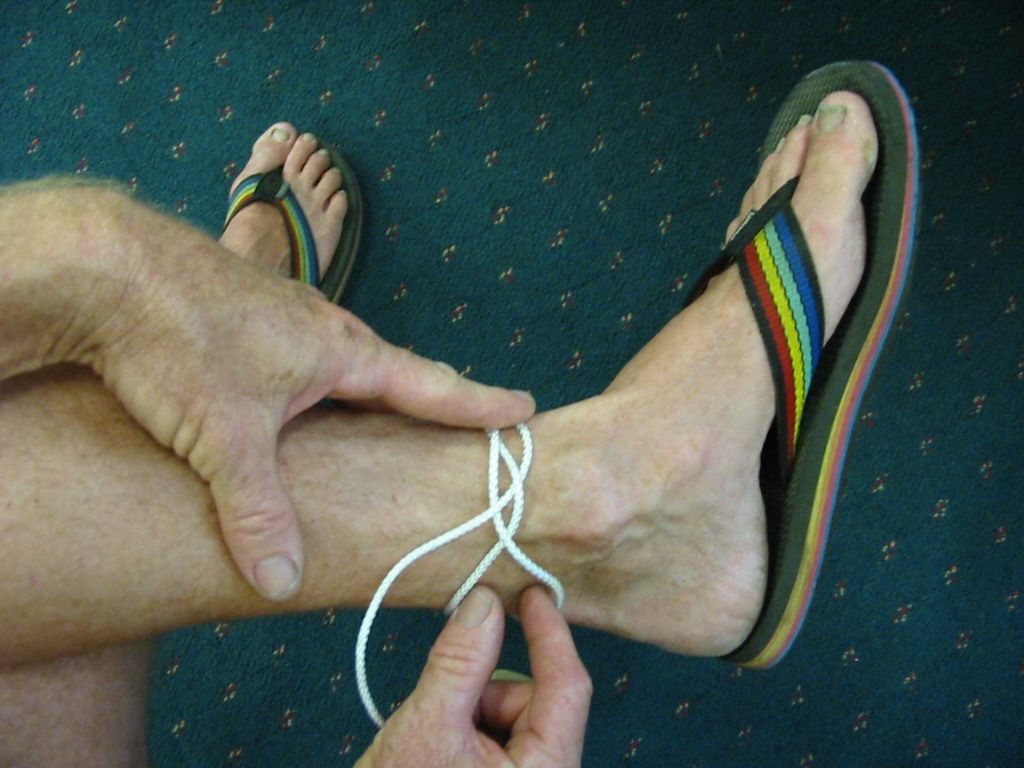
Step 4
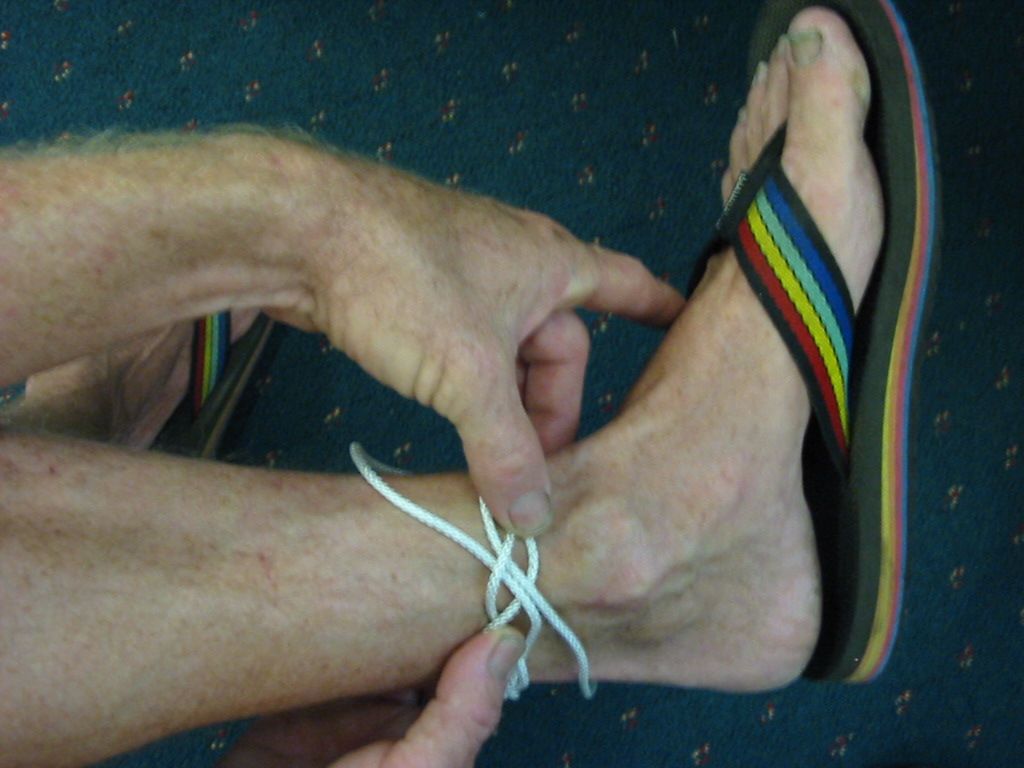
Disregarding the ends you will see two parallel lines of string. I call them the 'RAILWAY' lines. You have to cross them over each other then thread the loose end through so that it 'locks'. Many people ask me which way to cross the 'RAILWAY' lines. Well, it's a 50/50 chance that you'll do it right, so if it seems like it's not working, just cross them the other way.
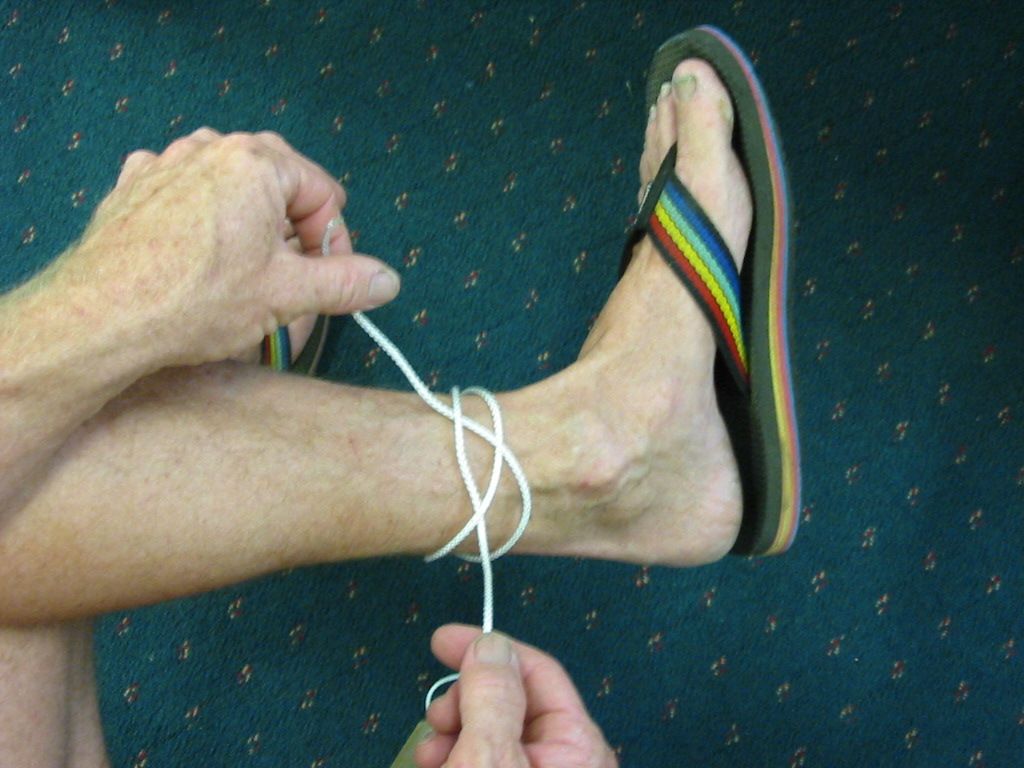
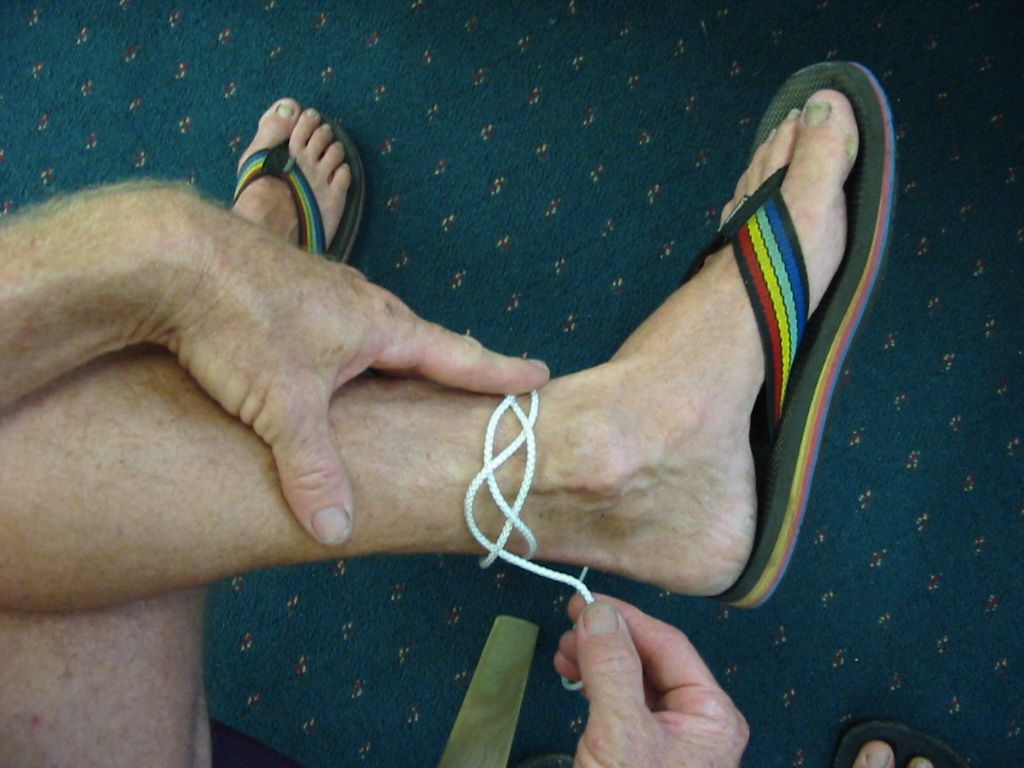
Step 5
Step 6
Cross the 'RAILWAY' lines again and this time put the loose end through the other way.
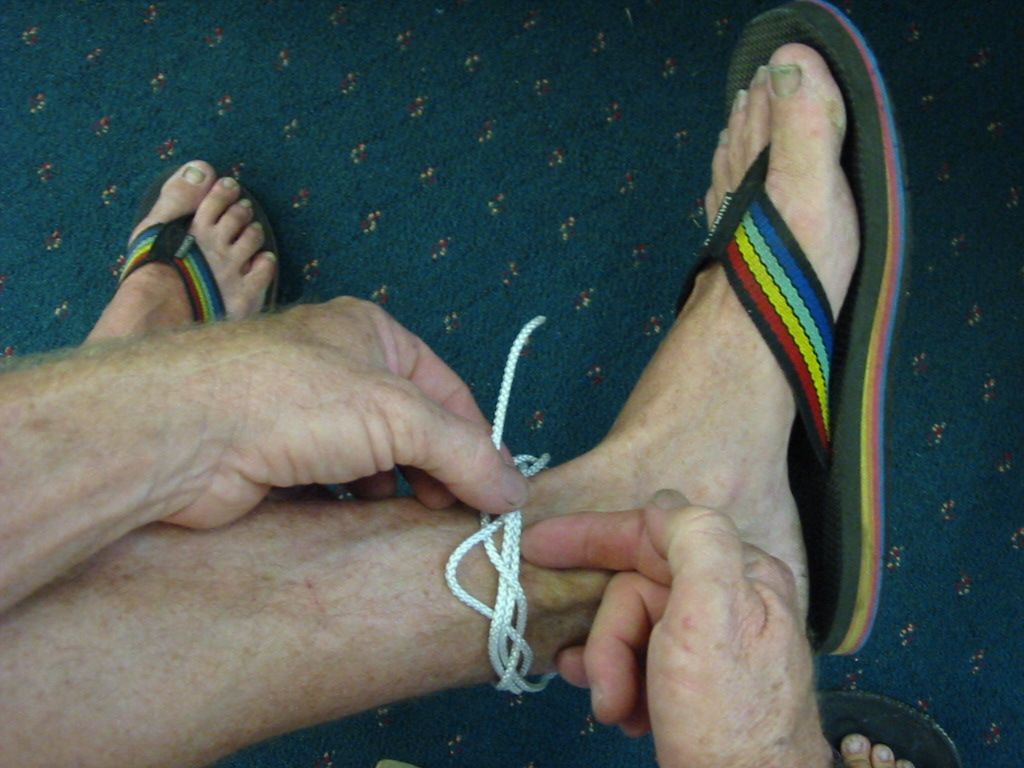
Step 7
Step 8
Continue this process until you find yourself back at the start.
Step 9
Now comes the trickey part: You have to pass one of the ends through one of the holes (doesn't matter which...it's just one piece of string remember) so that they both lie next to each (adjacent) other IN THE SAME HOLE going in opposite directions.
Step 10
Step 11
Well, now you're basically finished because all you do now is follow what you've done.
Step 12
Make sure you stay close to the string you're following. It doesn't really matter which end you use as they will all end up back where you started. When you have turned 1x1x1 into 3x3x3, just melt the end with a lighter and turn the whole band over so you can't see the join. NO END or rather 'the end'. Good luck. Any probs email me: palmweavers@mail.com
Step 13